Metadata Management: Version Control in Git (Part 2 of…
This article is second in a 4-part series on managing metadata assets in IRI Workbench using Git. It focuses on its metadata version control. Other articles in the series cover the use of Git: as a metadata asset hub, for tracking metadata lineage, and for metadata security.
This article details the submission of metadata assets in IRI Workbench into Git version control to track states of change.
Git repositories support version control to help track and manage metadata assets and to keep their history of modifications well organized and available. The repository stores every version of your project or asset, so that they can be tracked, referenced, and/or re-used.
Multiple users can make changes to their IRI software jobs, data definitions, and other assets, while avoiding potential conflicts with the main state of the metadata. This is important because of its distributed nature and the existence of backups on machines using the repository.
Security is ensured via SSH server connections, which also control user access. Contributors must sign the commits they make, so changes can be easily traced and monitored. I cover metadata security in more detail here.
Using Git integration plugin for Eclipse in IRI Workbench makes it very easy to take advantage of the version tracking capabilities that Git has to offer.
Specifying the Metadata Management Repository
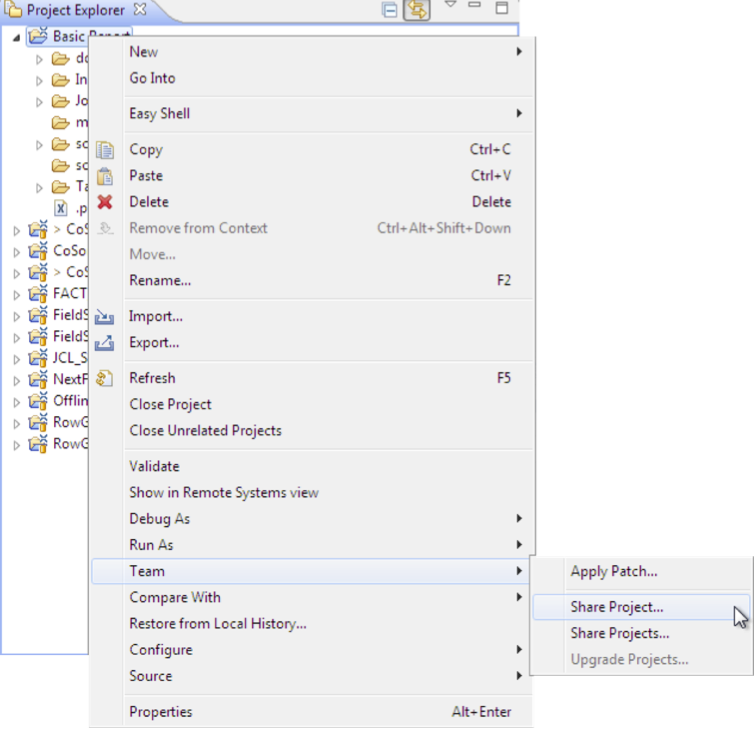
To begin, right-click on your project, named “Basic Report” for this demonstration, and go to the option Team > Share Project. Then select Git from the window that appears.
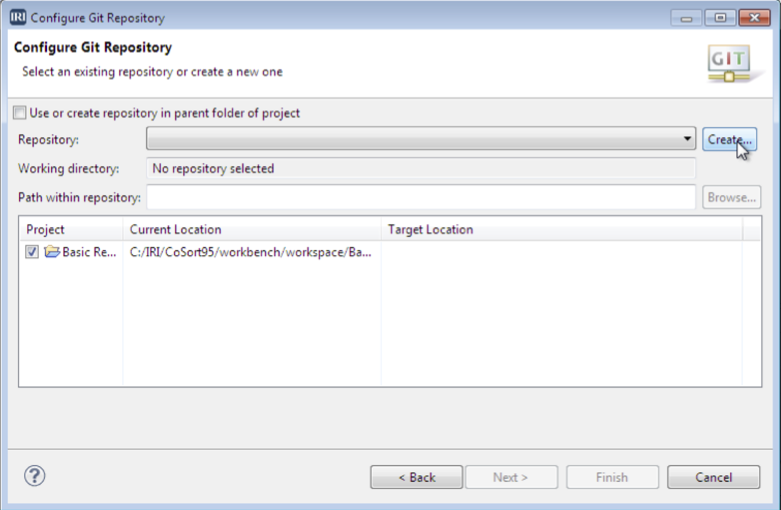
The next windows prompts you to choose a repository where your versions will be stored. Select the option to create a new one. For this demonstration, I named the repository “NewRepo.”
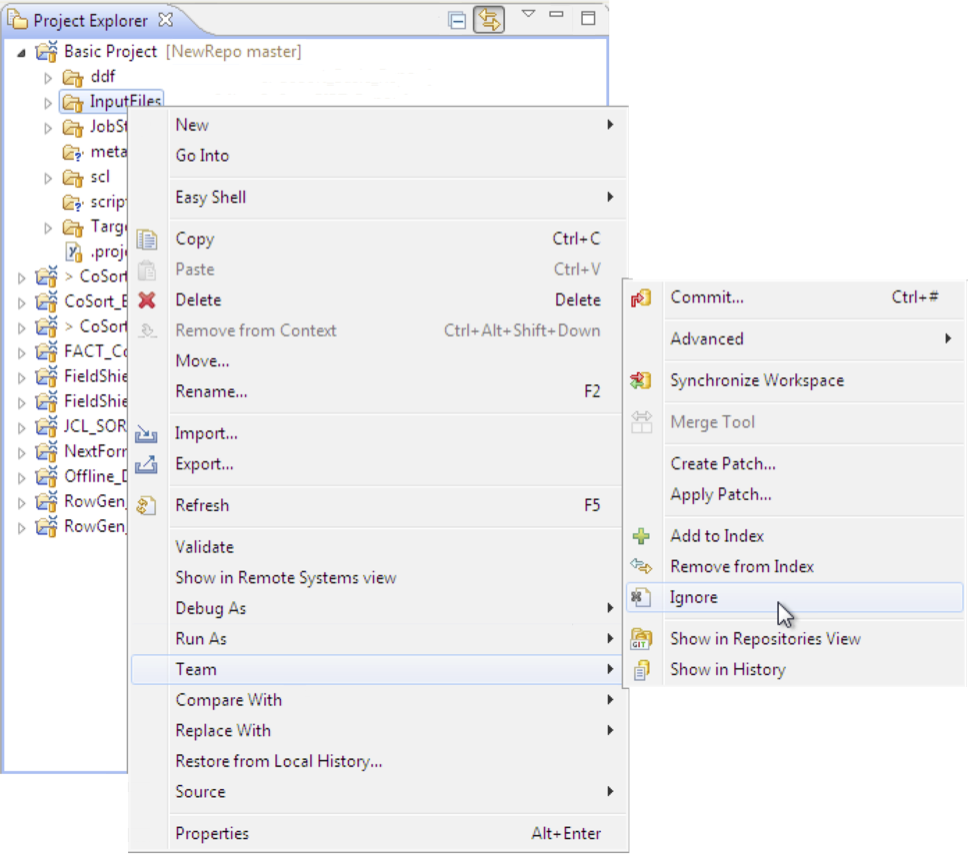
Your project will now display information in the Project Explorer to describe the repository and current tracking of the branch, or the current copy for your project’s changes. “NO-HEAD” simply means that no changes to your project have yet been stored in the Git repository. The “>” characters represent these uncommitted changes.
To view this repository in IRI Workbench where the changes of your project will now be stored, navigate to Window > Show View > Other. Then select the “Git Repositories” view. This window will appear with your repository listed.
At this point, all files in your project will be tracked, but it’s possible to ignore certain types of files so their changes will not be stored in the repository. To do this, right-click on the file you want to ignore and click on Team > Ignore. This will create a new .gitignore file. For this demonstration, the project will ignore all the files in my project except .scl files (CoSort SortCL job scripts).
Committing and Storing Changes
First, we will change something in the .scl file (metadata asset). In this example, I changed the “Monthly Payment” string in a target header record to “Payment per Month.”
Again, go to Window > Show View > Other and select the Git Staging view. This will allow you to easily view the change that has not yet been saved.
To store this change, first move it into the staging area. This is the index where the modified files are temporarily stored until, after review, you finally decide to complete and record the commit. To do so, drag the unstaged change to the staged changes section.
In the commit message section, detail what was changed in this version (use present tense), and select the commit option to store this information into your local repository.
Tracking Versions of the Metadata Asset
With these commits, you can see the most current information available, along with past versions, helping you analyze the lineage of the metadata through its modifications.
It is also easy to revert back to previous states of the metadata. Part three in this series will elaborate on tracking metadata lineage in this context. If you need to review part one of the metadata management series, click here for the introduction of Git as an Asset Hub in IRI Workbench.
