Creating CSV, JSON, XML and RDB Test Data
This article demonstrates how to synthesize and write data to CSV, JSON, and XML files, plus an Oracle table all at once via the IRI RowGen New Test Data Job wizard in IRI Workbench. If you are interested in synthesizing and populating an entire RDB schema with referential integrity however, see this article.
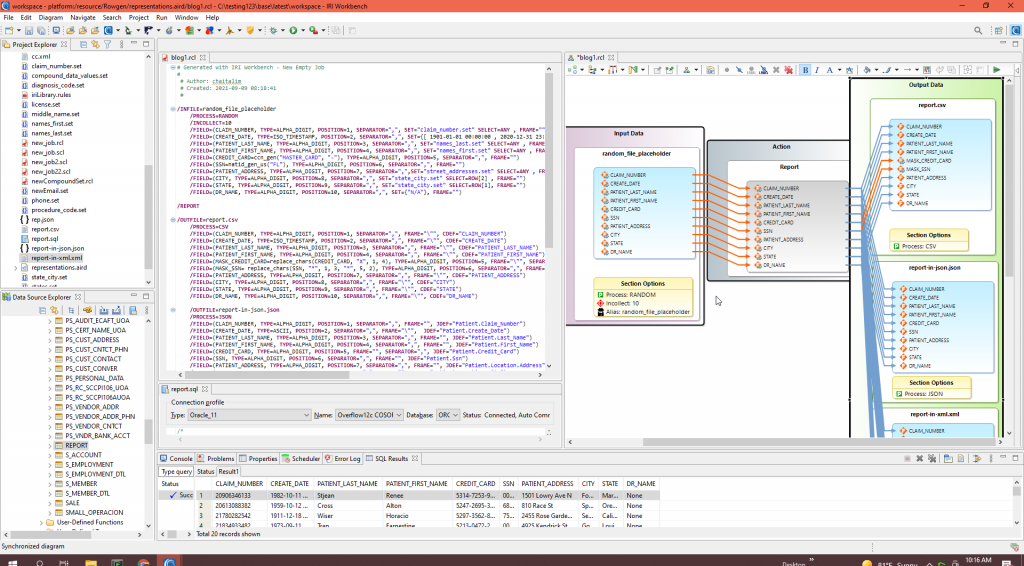
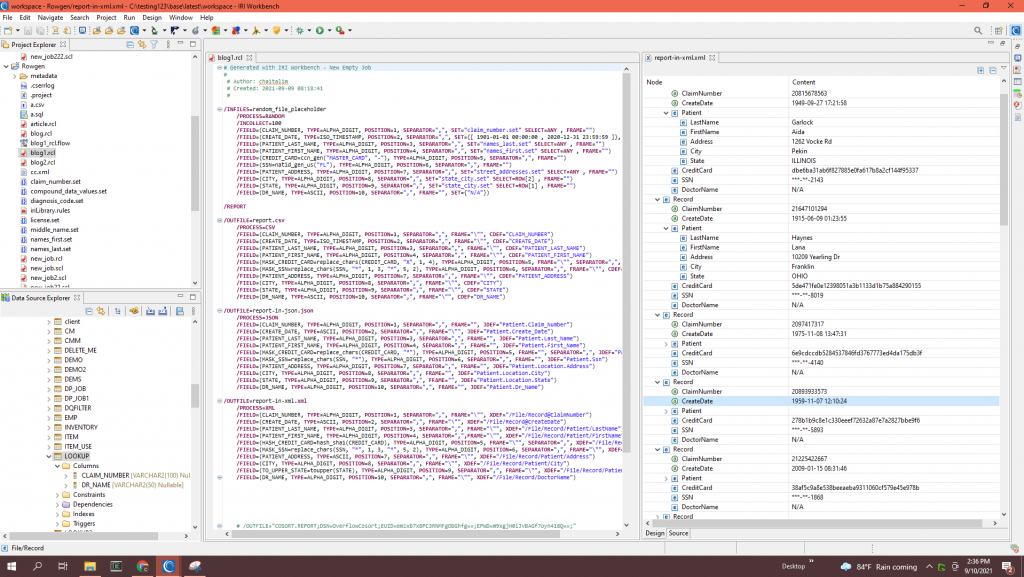
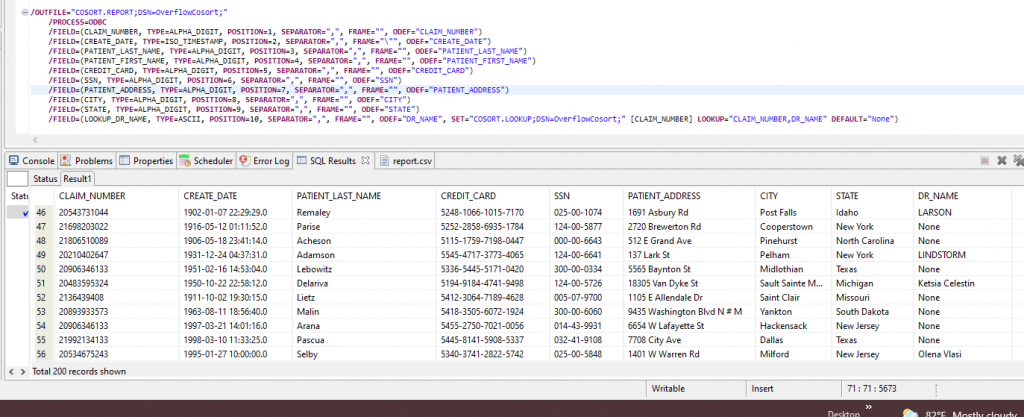
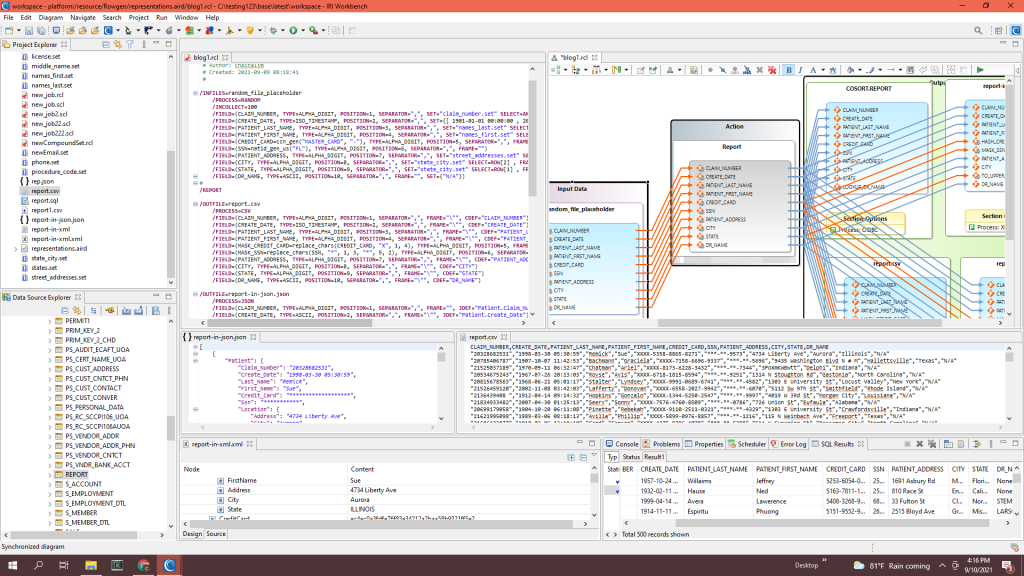
The IRI Workbench screenshot below displays the RowGen script produced by the wizard along with its transform mapping diagram, plus the target test data written by the RowGen job into an Oracle table.
Data Preparation
RowGen users can synthesize test data in multiple ways:
- Random generation of characters and digits by data type and length (with allowances for frequency distribution)
- Random selection of real or generated values from external set files, or from values in database (lookup) tables
- Custom string/format definition and random generation of the component values
- Random generation of computationally valid or invalid values of known string types like credit cards (CCN), dates, national ID (e.g., social security) numbers, etc.
- Subsetting and masking of data in existing production files or related database tables
Set files are text files composed of one or more tab-separated columns or ranges. They can be created from a number of different sources, using a number of techniques.
For example, they can be created with a text editor, with an IRI job or wizard that extracts column values from files or wizards, SQL commands, etc. In addition, many sample set files are also included in the base RowGen (CoSort) package found under the $COSORT_HOME folder.
In this demonstration, I will be using several set files from the IRI-provided folder, including names_last.set, street_addresses.set, and state_city.set. I will also use random value generation, and the Data Generation Rule wizard to synthesize “valid” CCN and NID values.
Start the Job
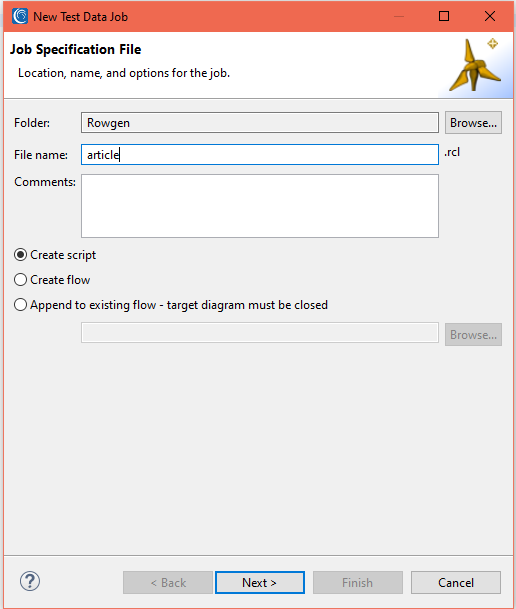
From the top toolbar menu, select the New Test Data Job wizard from the RowGen menu. Enter a filename (RowGen jobs are created with .rcl extension).
Select the Create Script radio button and click Next:
Define the Test Fields to Generate
By default, RowGen will generate random values for the data type specified for each field (the default is ALPHA_DIGIT). However, the data types and lengths can be changed. Here I have used ASCII and ISO_TIMESTAMP data types as well.
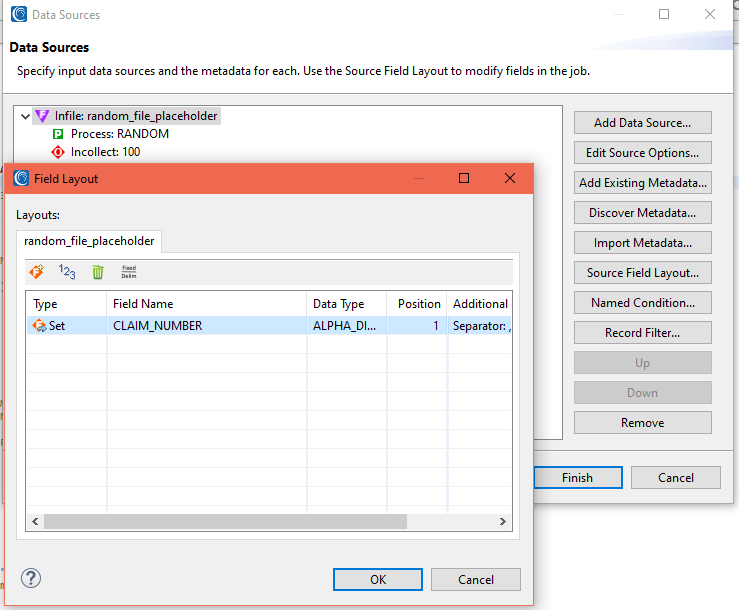
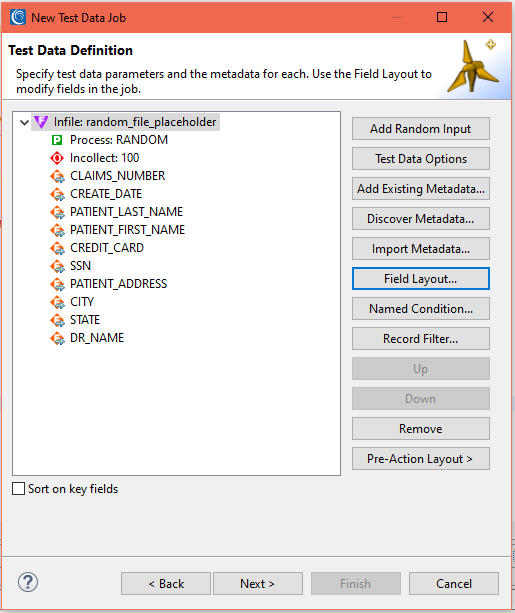
Next on the Data Sources page, you will see for Infile only “random_place_holder” to indicate dummy data is being produced (vs. reading from a production source). The Incollection option refers to the number of records/rows you want to generate in this phase (the default is 100).
Then click on Source Field Layout where a data layout screen is provided for each named test field you will generate.
- Click on the F icon to add a field
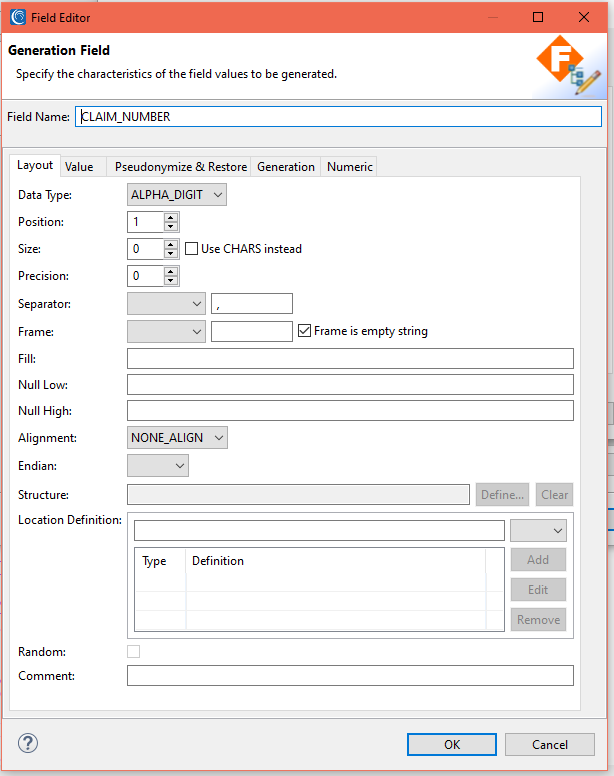
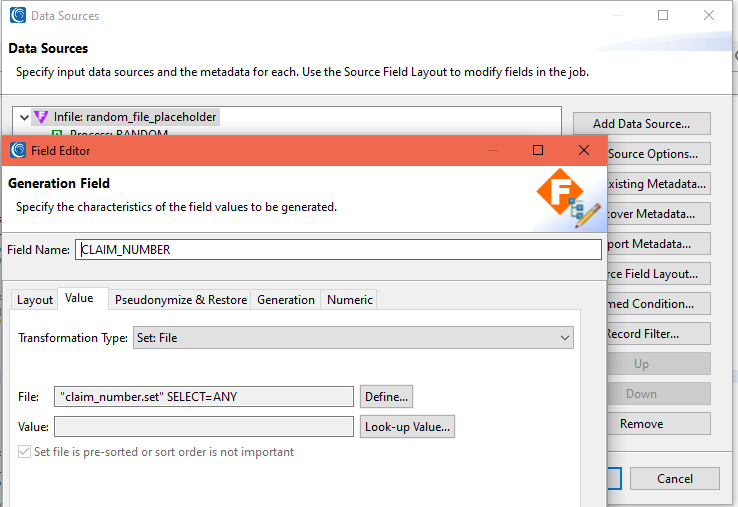
- Double-click on the field to open the Field Layout Editor to handle attributes like the field name, data type, position and, if desired, a rule like a set file value lookup.
The screenshots below display the process of creating a field that will get values from a set file.
Adding Rules to Create Credit Card and Social Security Numbers
To add a rule, right click on the field in the Target Field Layout editor to bring up the context menu. Then, select the menu item Add Rule. Select the Create Rule sub item to define a new rule, or select Browse Rule to re-use a previously-defined rule.
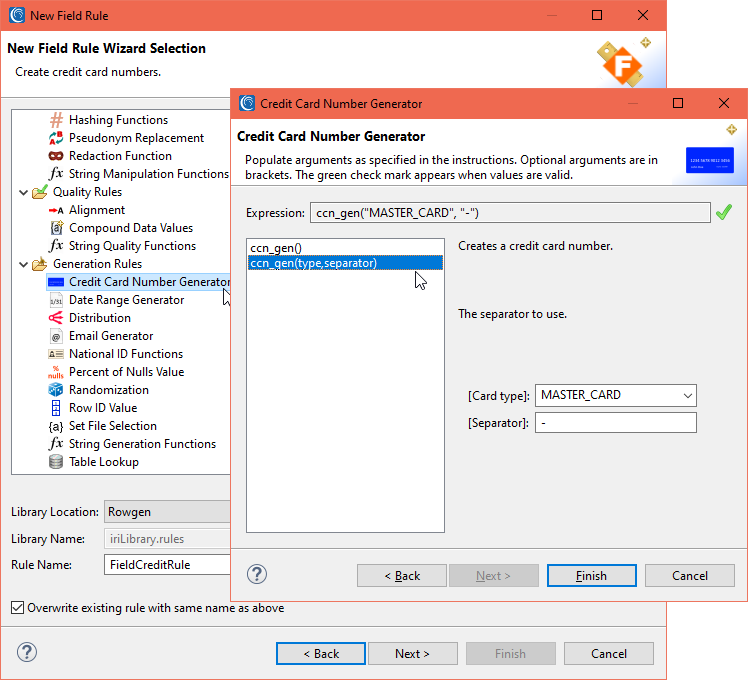
Choosing to create a new rule will open the New Rule wizard. To generate credit card numbers, select Credit Card Number Generator under Generation Rules. There are two options to generate credit cards. In this instance, the second option was selected that allows the credit card type and separator to be specified.
A Social Security (or similar) number rule can be created from the list of National ID Functions.
The image below displays the final field layout.
Next, we will use the Data Targets dialog to define the output files and their layout(s). Note that because RowGen uses the same SortCL metadata and executable as CoSort, NextForm, FieldShield, and Voracity, it is also possible to reformat and transform the generated data in the target phase.
Define the Targets
Click Next at the bottom of the Test Data Definition dialog to begin specifying the data targets and their field layouts.
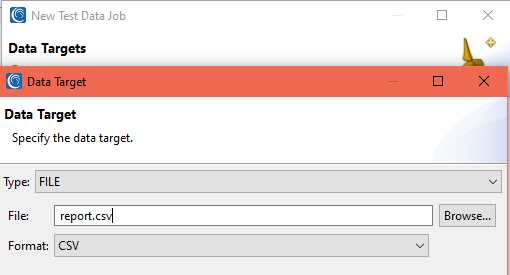
The first output file will be in CSV format. In this case, I named the target report.csv and assigned the process type (file format) to be CSV:
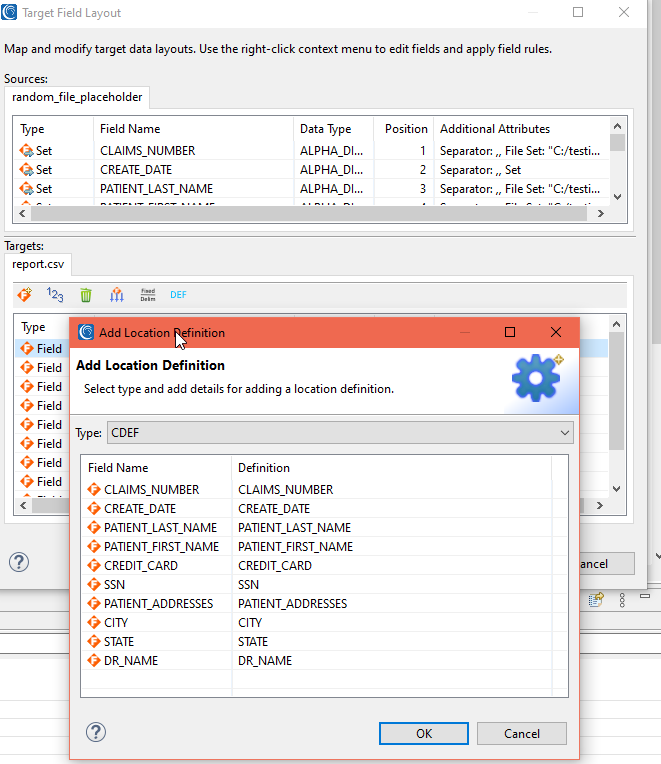
Clicking OK displays the generated fields mapped by default into a target tab with my file name. In the Target Field Layout Editor dialog shown below, you can add rules to each field, and a new locator (field name) assignment specific to the format (in this case CDEF for CSV):
Format specific location definitions can be important when the location of that field in the target needs to have another name, case, or even formatting syntax, like an XML path structure. Localized fields may also be incompatible with IRI /FIELD naming conventions, too.
When you click on the DEF icon in the target, you will see an Add Location Definition page. In its drop-down menu shown below, you can add DEFs for CSV files (CDEF), JSON (JDEF), XML (XDEF), and ODBC (ODEF) for SQL-compatible RDB column names. There is also support for LDIF (LDEF) file, MongoDB (MDEF) document, and Excel (SDEF) spreadsheet locators, too.
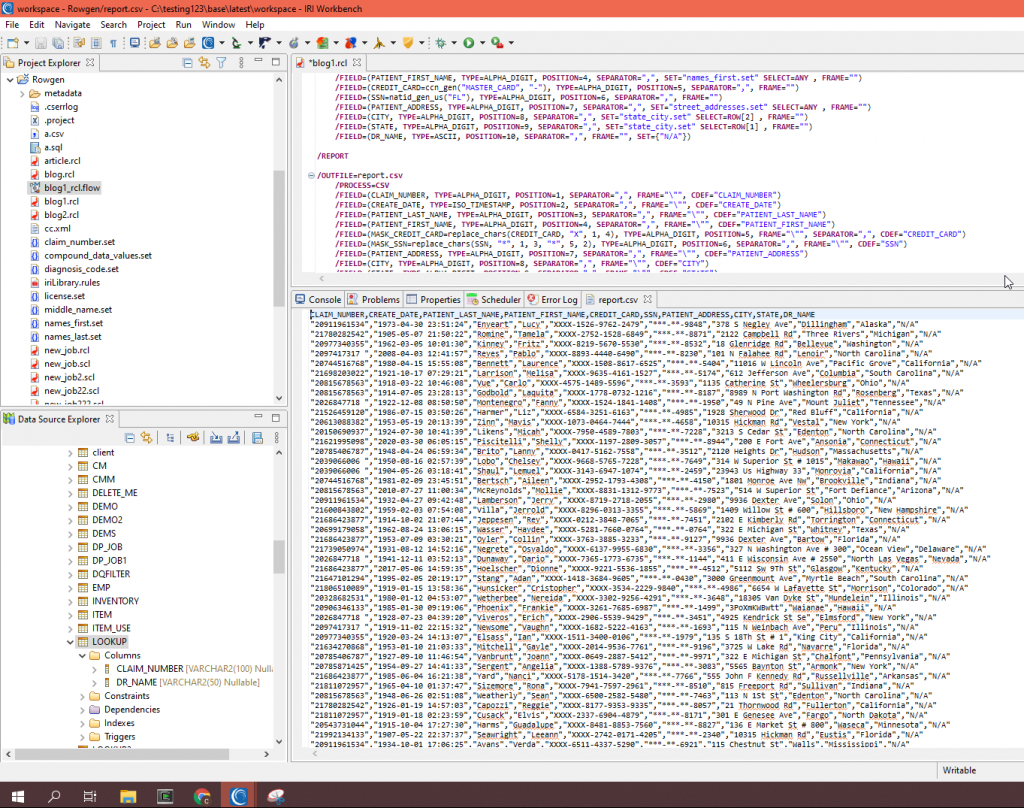
Below is a screenshot of the CSV output file produced by this part of the RowGen job:
Creating JSON output
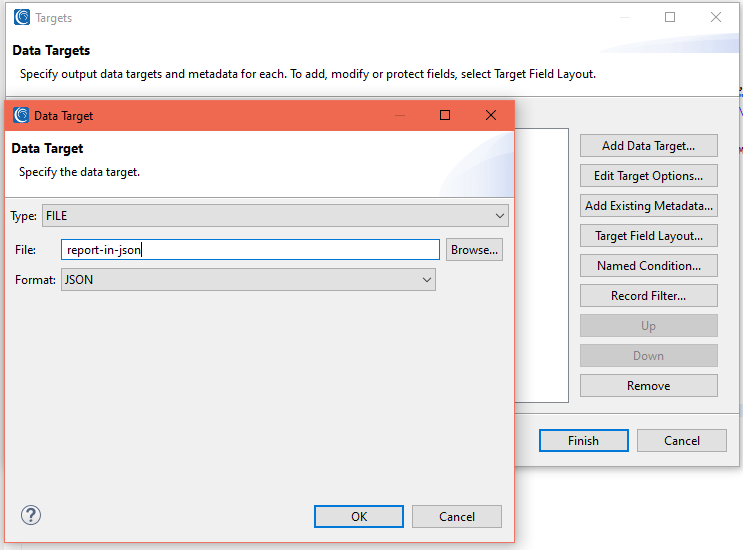
The next target from the same generation job will be a JSON file containing my test data. In this screen I specify the format as JSON and name the file:
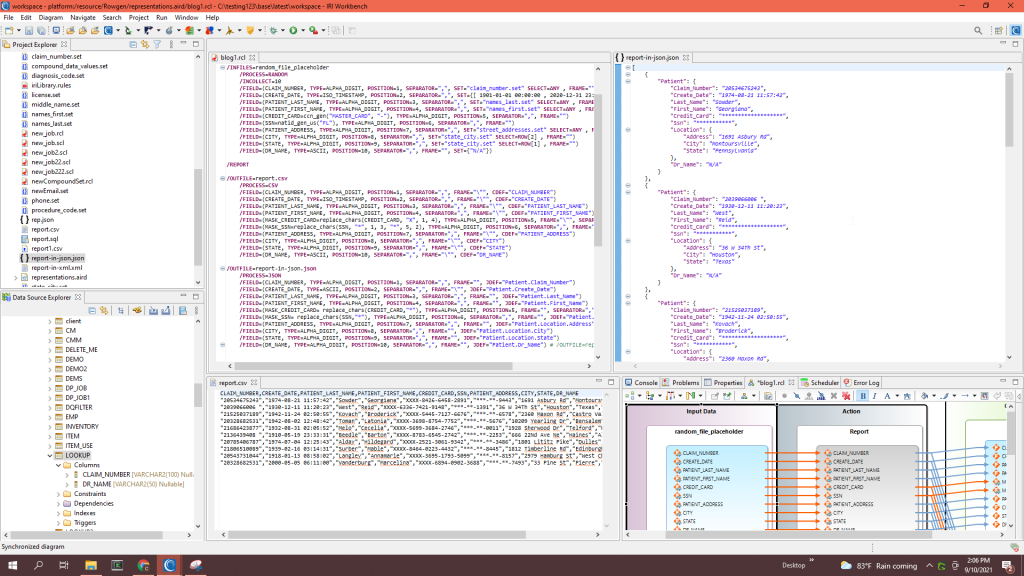
I was also able to automate the generation of optional JDEF locators in the specs. The screenshot below show the script, mapping diagram and both the CSV and JSON test files produced by the job:
Follow along with our YouTube video creating a JSON file!
Creating XML Output
XML (and other targets) can similarly be defined. The screenshot below shows the XML test file target on the right:
RDB Target Table
In the same way I generated flat files in various formats, I can also write generated test values into an empty (or append to an existing) RDB table. I can do this from the initial job wizard by adding another data target, or after the fact in this case from the prior script by adding to it.
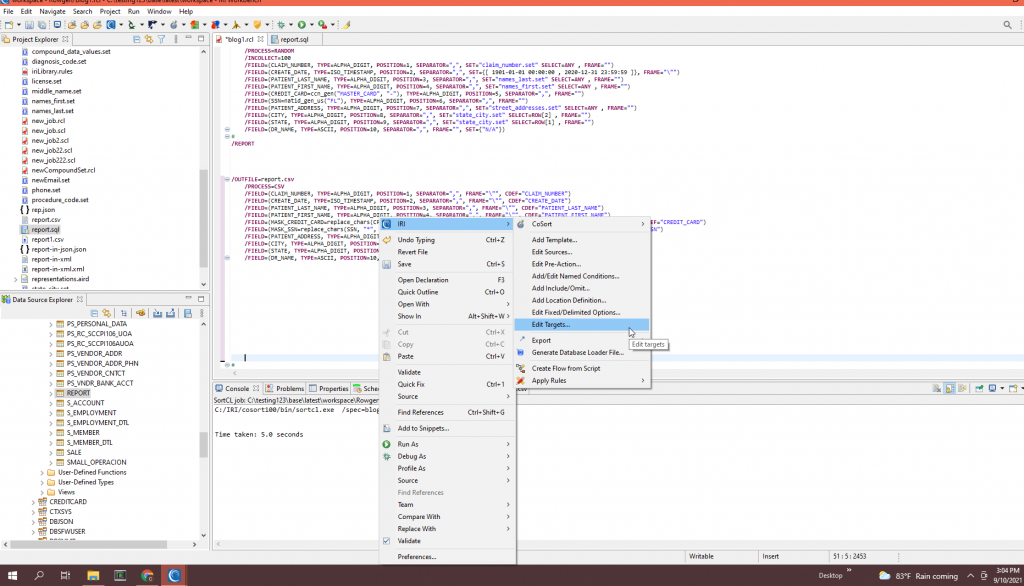
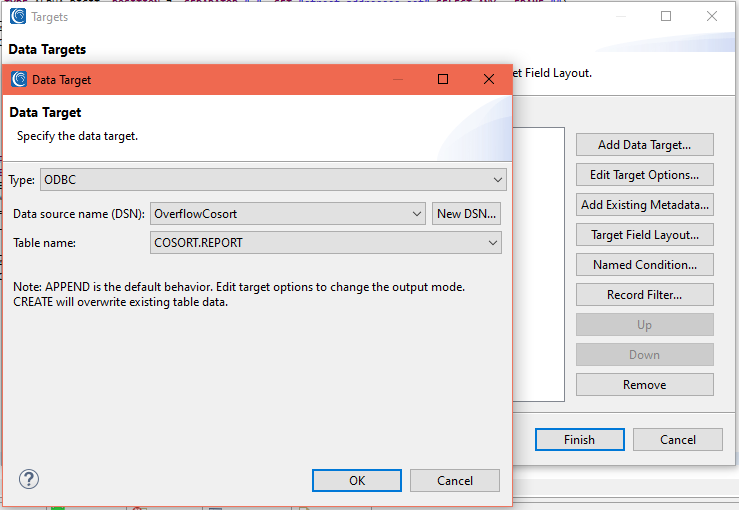
To add another target file to the same job, open the context menu from within the script editor. Right click to expose the menu and select IRI > Edit Targets > Add Target. Follow the same type of steps described previously; i.e., specify the format (ODBC this time) and the table detail.
In this particular example, I am selecting from a list of connected and registered DB connections (e.g., “OverflowCoSort”) and an existing table called REPORT, which I created separately in the COSORT schema using the SQL Scrapbook feature of IRI Workbench.
Here is the .sql file I built and ran to create that table:
Once again, I am also able to create the locator specifications for the column names to assure they will conform to the target table layout, even if they differ from the /FIELD name(s) in the /INFILE or /OUTFILE section of the job script. Here, I am adding the ODEF location definitions:
Select the OK button and the Finish.
RDB Test Table Data
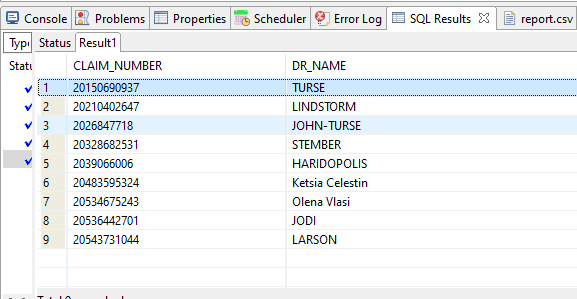
At the bottom of the IRI Workbench screenshot below, the data in the Oracle database is displayed via SQL SELECT in tabular format (Claim_Number,Create_ Date…).
Adding a Lookup Rule for Doctors
I also want to add a column in my targets for the names of doctors in an existing table in Oracle that match claim numbers in that table and another I’m generating. This simulates a join scenario.
Suppose you have a database table with a few of the claim numbers that also has a column with the attending doctor’s name. We can look up the doctor’s name that exists in the table and use a default name for the non-existent claims.
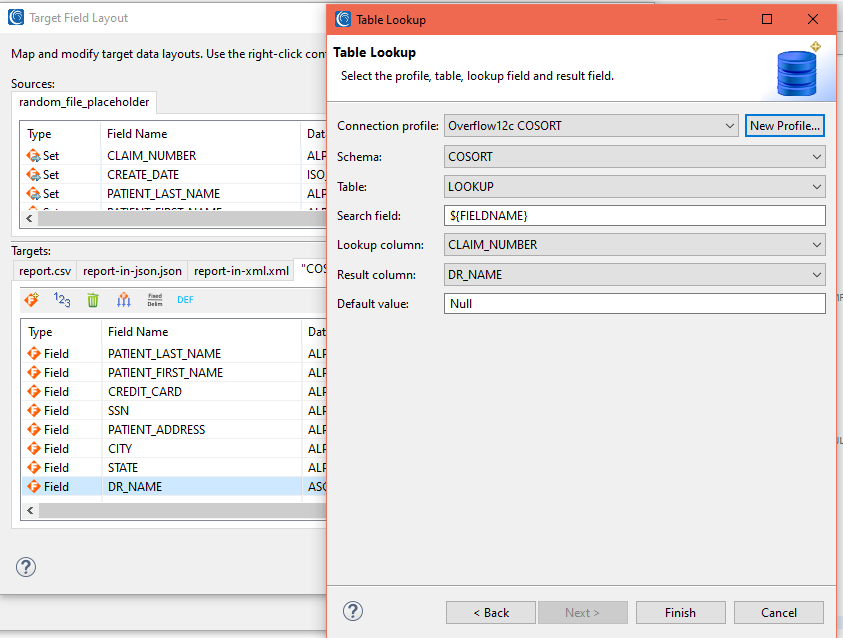
If there is a match, the associated doctor name from the lookup table will be put into the output table. If there is no match, then the default value will be used in the output:
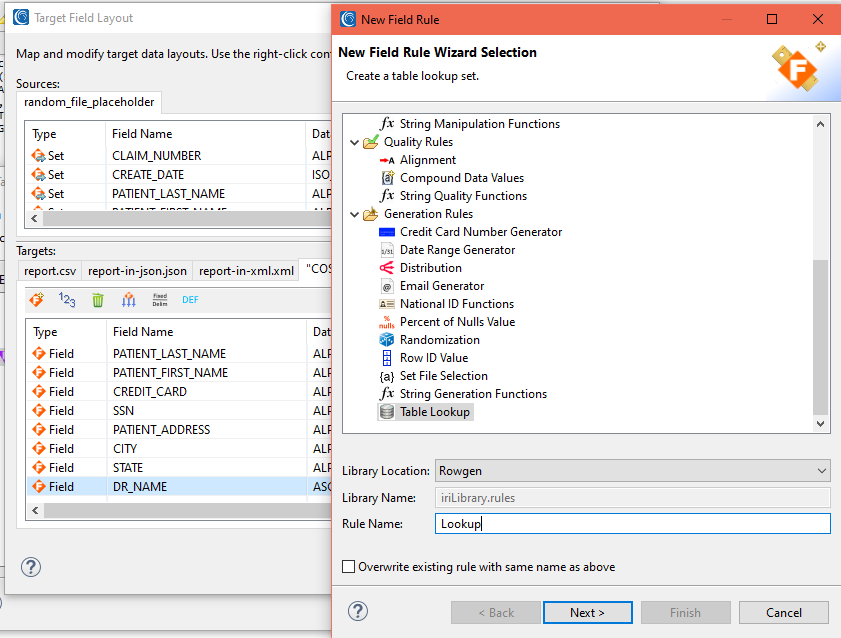
To create a value lookup rule and apply it to the DR_NAME column, select the field in the target field layout editor dialog that will get a lookup value into. Right click on the field to create a rule:
Name the rule, click next, and apply it using the Table Lookup dialog attributes:
In this case, the last field, DR_NAME, will get values from the names of doctors associated with each CLAIM_NUMBER from the table named LOOKUP:
Creating Job Diagrams from Script
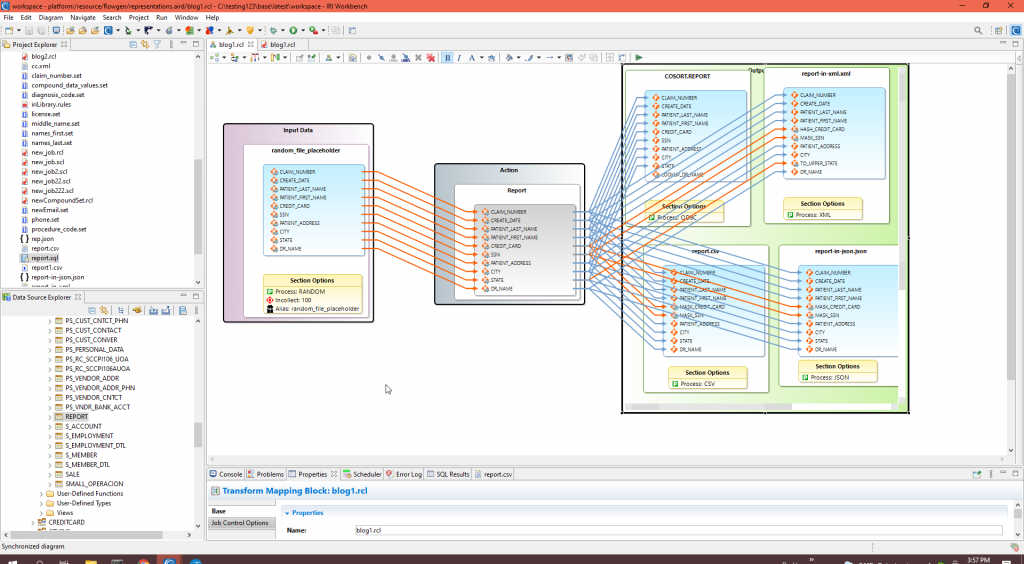
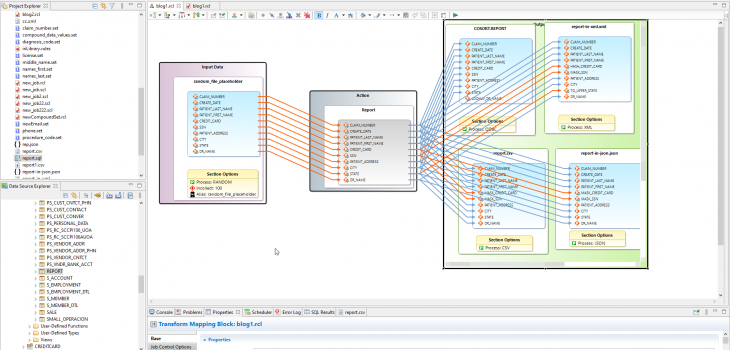
Given a valid RowGen (.rcl) job script in IRI Workbench, I can create a workflow and transform mapping diagram to use, share, and work in as well.
Create a workflow diagram from inside the script editing window with a right click, then click on IRI and Create Flow from Script. Once the workflow diagram is open, double-click on the central brown task block to create the transform mapping diagram showing the (actual) source-to- (test) target field movement.
All Together in IRI Workbench
This screenshot shows the RowGen job script and mapping diagram, and all four output files; i.e., my test targets in JSON, CSV, XML and SQL:
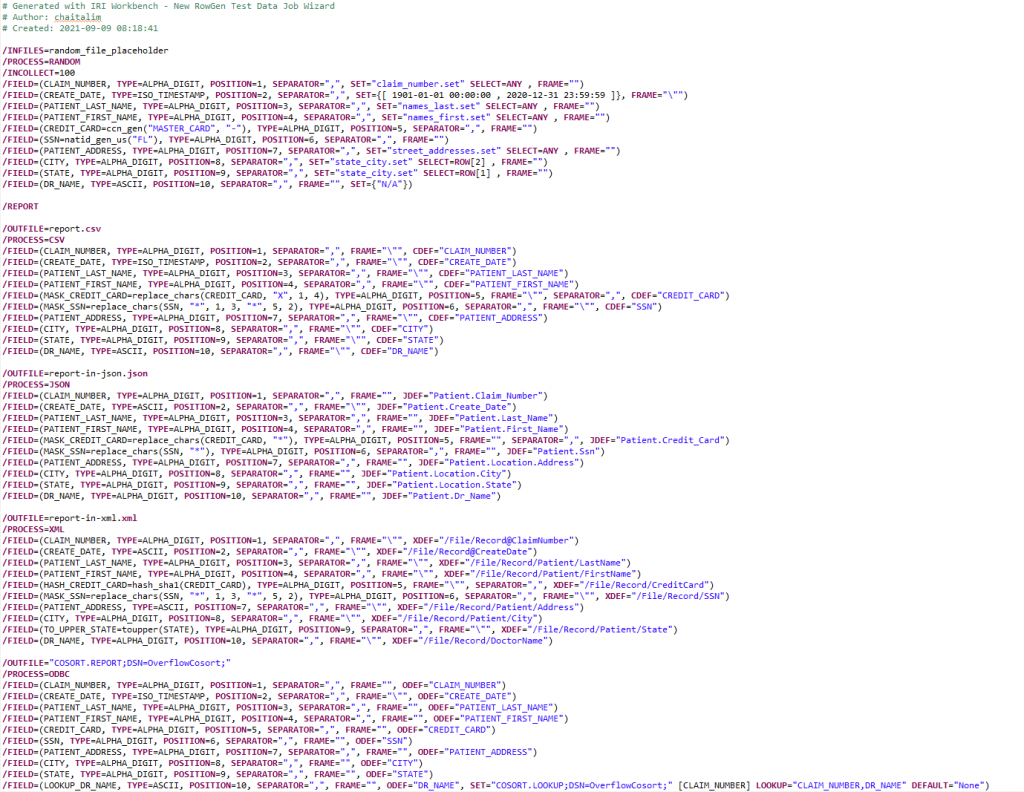
The Full Job Script
This job code (.rcl script) was created with the New Test Job Wizard — and some dialog tweaks to the script after the fact — in the IRI Workbench GUI for RowGen. If you need help using RowGen or have any questions about what it can do, email rowgen@iri.com.
