PII Masking in Amazon S3 Files
Just as users of the IRI FieldShield data masking tool can mask personally identifiable information (PII) in flat files held in Amazon Simple Storage Service (Amazon S3) buckets, IRI DarkShield users can now find and mask PII in structured, semi-structured, and unstructured files stored in S3, too. DarkShield can also protect data in Azure Blob, GCP and SharePoint Online, as well as on-premise folders. This article covers S3 only.
What is Amazon S3?
Amazon S3 is an object storage service designed to make web-scale computing easier for developers. It is used to securely store any amount of data for a range of use cases, including websites, mobile applications and big data analytics.
In terms of implementation, the Amazon S3 operates as a simple key-value store designed to store as many objects as you want. Objects are placed into user-defined containers called “Buckets” and can be retrieved or manipulated using the Amazon S3 API.
Example: Amazon S3 Data Masking with DarkShield
This example uses some elements of Dark Data Discovery. The general idea is that, after parsing through data in unstructured sources, you can output what you’re looking for in a structured text (flat) file, with its layouts automatically defined in a data definition file (.DDF).
While this example provides a brief introduction to dark data discovery, you may find it useful to read this three part blog series that explores the feature in depth.
For this tutorial, I created a new Amazon S3 bucket containing a text file named “helloS3.txt”. The file contains “Hello, S3 Bucket!”. There is also a folder named “folder” within the bucket as well, containing the same file.
The goal is to use the Dark Data Discovery wizard to create a search and remediation job that will mask all of the data within the specified bucket and upload the masked data to another bucket within the same account.
For reference, this is how the Amazon S3 Bucket is setup:
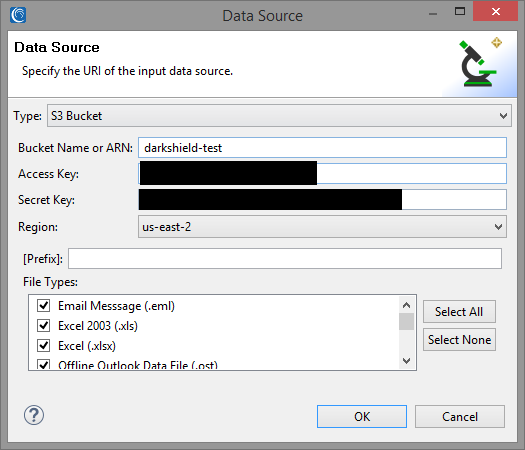
To access the Dark Data Discovery wizard, select the DarkShield dropdown menu from the IRI Workbench toolbar and select Dark Data Discovery Job. The wizard will open this way. Define a destination for the job and navigate to the Data Sources window. Selecting Add will take you to the window displayed below.
Input the relevant data from your S3 Bucket. The access and security key are obtained from your AWS credentials.
An optional prefix can also be specified in a URI. Doing so will filter only on the objects that appear under the given prefix. For example, inputting “folder” into the prefix field will only return objects that appear within “folder” in the S3 Bucket. Otherwise, all objects are returned.
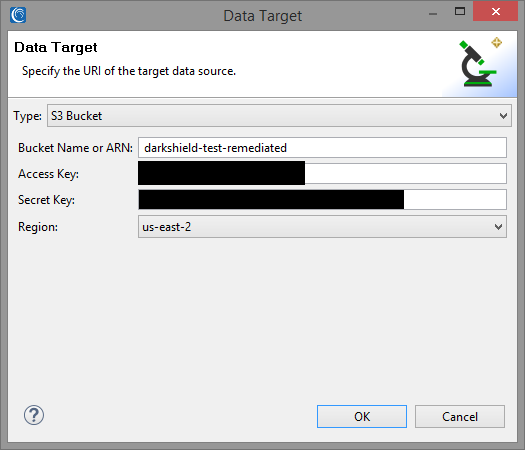
After all the relevant information is selected, select OK. The next window will prompt you to specify a data target as seen below.
For the data target, we will specify another bucket within our Amazon S3 account named “darkshield-test-remediated” using the same access and secret key as our source. If there is no bucket with that name contained within the account, a new bucket with the same name will be automatically created.
It also should be noted that data sources and targets can be mixed. For example, you can establish any combination of routes such as “File to S3 Bucket”, “S3 Bucket to S3 Bucket” and “S3 Bucket to File” depending on your use case.
When transferring contents from an S3 Bucket from one AWS account to a bucket on a different AWS account, certain permissions have to be set in each account in order for the transfer to be successful. For a guide on how to do that, please refer to this article.
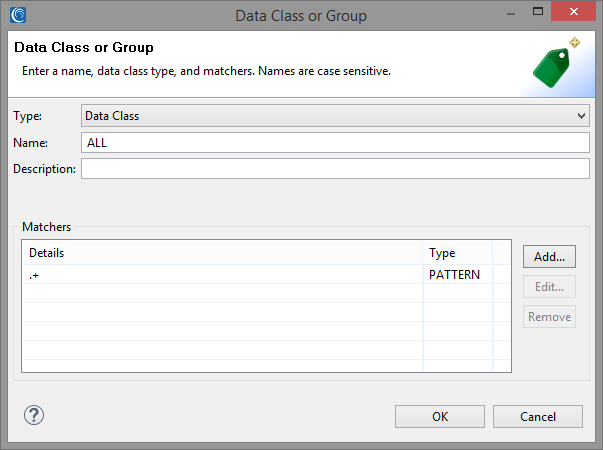
We will create a simple Search Matcher for matching the entire contents of our sample files. We can create an ad-hoc “ALL” Data Class loaded with the regex pattern “.+” to match on the entire contents of the document.
For a more detailed overview of Data Classes and search methodologies used in DarkShield and its sister products FieldShield and CellShield EE, refer to the following article on Data Classification.
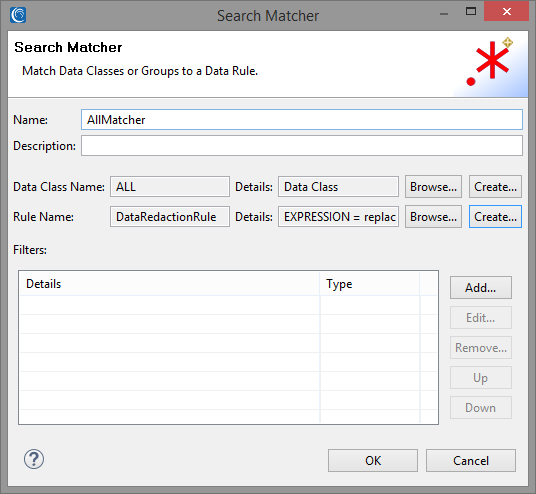
We will attach a simple Data Redaction rule to our Search Matcher to replace every matched character, including whitespace, with an asterisk ‘*’. The screenshot below shows the final state of our Search Matcher.
Note that for the purposes of this basic AWS S3 data protection demo, we will not be going into detail regarding the optional Filters field. For more information, please check our upcoming Filters blog.
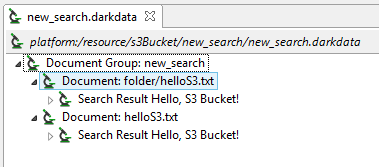
Finishing the wizard generates a .search file, which you can right-click and select Run As -> IRI Search and Remediate Job to execute. You can see our .darkdata search results in the image below, where we matched on the entire contents of the two files within our S3 bucket.
DarkShield will create the darkshield-test-remediated bucket if it doesn’t already exist, and place the remediated files within while retaining the same folder structure as the original:
If you have any questions about, or need help using, DarkShield for protecting PII in AWS S3 sources and/or targets, please email darkshield@iri.com or contact your IRI nearest representative.

