Pseudonymize Your Sensitive Excel Data with CellShield [video]
This is the last in a four-part series to introduce IRI CellShield. An overview is found here. The following parts demonstrate how to use the other functions in CellShield: data masking and encryption. If you’re interested in finding, classifying, or masking PII in databases or flat files, check out IRI FieldShield. For semi-structured and unstructured text (log, email, .pdf, etc.) files, see IRI DarkShield.
IRI CellShield is a new, seamless security software for masking PII in spreadsheets. CellShield comes as either an inexpensive Excel add-in, or an enterprise edition for LAN-wide PII discovery, remediation, and auditing. Both versions perform full or partial redaction, encryption (including format-preserving) and decryption, and pseudonymization:
Users can select a range of cells to protect, and then click the type of protection needed. CellShield offers an easy-to-use interface, and quickly does the work. For pseudonymization, select the option to create a restore file that can be used to recover the original data at a later date. This allows only specific users with the restoration file to see the protected information, but allows others to work in the same spreadsheet without having access to that same information.
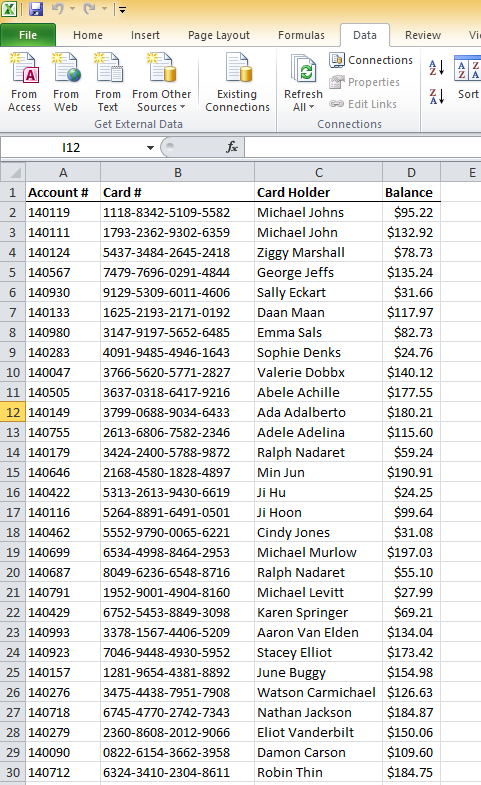
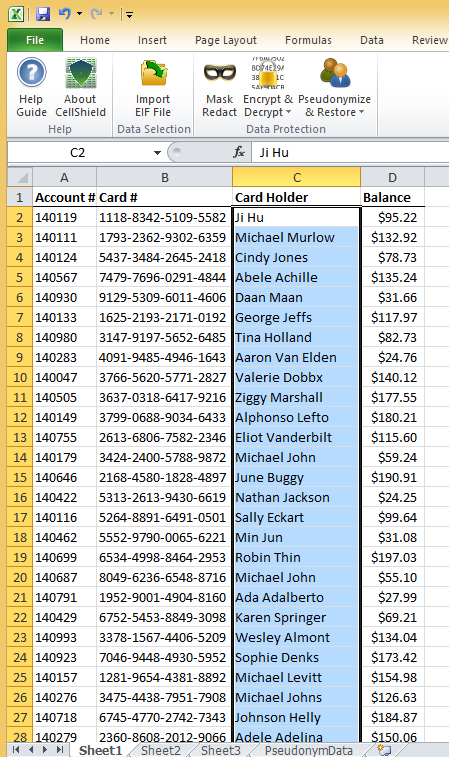
Below you will find a step-by-step example of just ad-hoc ‘Pseudonymize & Restore’ in CellShield and the different options available. (Note: All information used in this example is fictional.) The enterprise edition can perform these functions en-masse across multiple sheets at once.
1. Open the Excel spreadsheet containing the data you want to pseudonymize using CellShield.
2. Select the range of cells to pseudonymize.
3. Click the CellShield tab on the Excel ribbon.
4. Click the ‘Pseudonymize & Restore’ button on the CellShield menu; and select ‘Pseudonymize’ from the drop-down list.

5. CellShield gives you the option of saving a Restore.set file for future recovery. Select ‘Recoverable’ or ‘Non-Recoverable’ within the Pseudonymization Menu.
6. Fill in all required information on the user form that pops up for ‘Recoverable'(shown) or ‘Non-Recoverable’ pseudonymization. Then you can:
a. use the original data and shuffle it (like a deck of cards);
b. use a single-column flat file containing at least as many rows of data for replacement; or,
c. replace all the values with a number sequence (pictured) by leaving the replace file blank.

7. Click the ‘Pseudonymize’ button on the form, and the results will be sent to a new spreadsheet for ‘Recoverable’ Pseudonymization, or the selected range will be replaced if ‘Non-Recoverable’ was chosen.
UPDATE: CellShield version 2.0 has been released and includes many new features and fixes, including UTF-8 support for pseudonymization.
