Using the Voracity Pivot / Unpivot Wizard
A new wizard in the IRI Workbench GUI for Voracity can pivot or unpivot relational data. A pivot transformation converts rows to columns and is helpful when dealing with denormalized tables. Unpivot converts columns to rows and can be used to create reports based on normalized tables. Because the wizard front-ends the CoSort SortCL program in Voracity, it will also work on data in flat files and other ODBC sources.
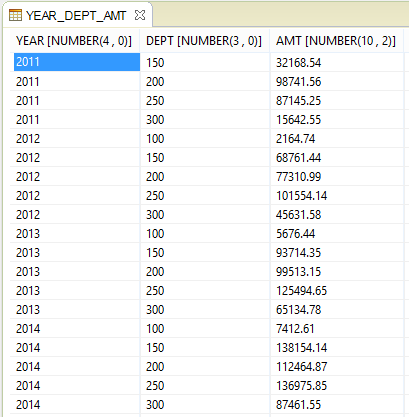
In this example, the table YEAR_DEPT_AMT is denormalized because both the year and department have repeating data. I can use the Pivot Job wizard to pivot on either YEAR or DEPT depending on my desired output. A sample of the source data is shown below:
Pivot
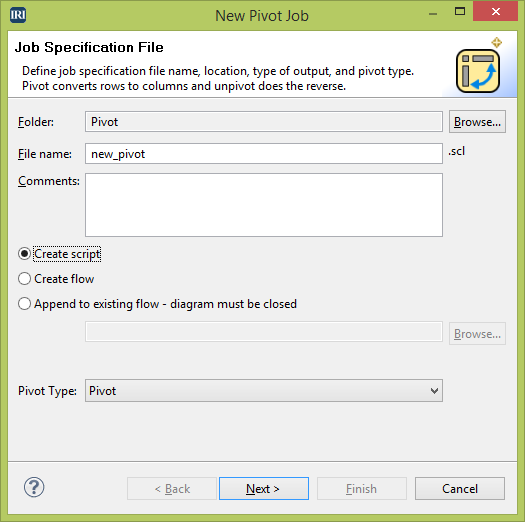
When starting the wizard, I enter the name, location, and format of my output, and the pivot type. In this first run, I will leave Pivot selected.
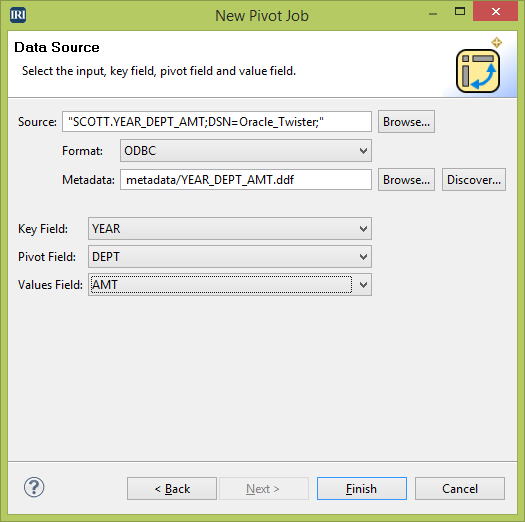
On the second wizard page, I select the source, format, and metadata of my input data. In the drop-downs below this, I select the key (YEAR), which will be the field that I combine and sort my data on, the pivot (DEPT), which is the row that will become the column, and the values (AMT) field, which contains data that will be moved.
Executing the script this wizard made produces the following output:
The script also produced a header row from the name of the key field and the data in the pivot field so the user can clearly see how their data was reformatted. The YEAR and DEPT fields are no longer displayed repeatedly. The values have been moved to a grid format rather than a list.
I could have, instead, chosen to pivot on the YEAR using DEPT as the key producing this output:
Unpivot
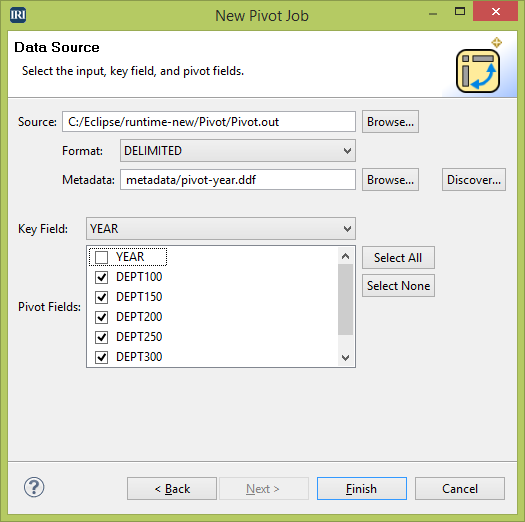
If I want to unpivot the above Pivot.out file, I first remove the header row so it does not become part of my data. Then, in the wizard, I select Unpivot as the transformation type in the setup screen. The second page will have different fields to fill out after entering the source options.
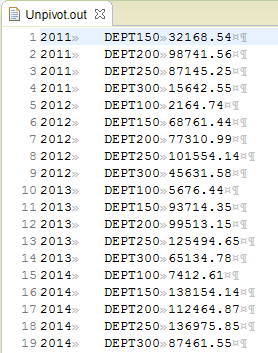
On this page, I select the key (YEAR), which is where the data will be expanded, and the pivot fields where the values reside. Using Unpivot will take the name of the metadata field and use it as the new data in the new column. Above, you can see that the metadata uses the names “DEPT100”, “DEPT150”, etc to define the fields.
Here is a sample of the unpivot results:
If I had named my fields “100”, “150”, etc., in the metadata file, I would have produced the same output as in the table shown at the beginning of this article.
The pivot options in this new wizard assist in either normalizing your tables or creating more concise reports. Using unpivot can expand your data, which is useful if you need to extract portions of it to feed it into different reports.
For more information on pivot and unpivot transformations, see this article. If you need help using the wizard, contact voracity@iri.com.
